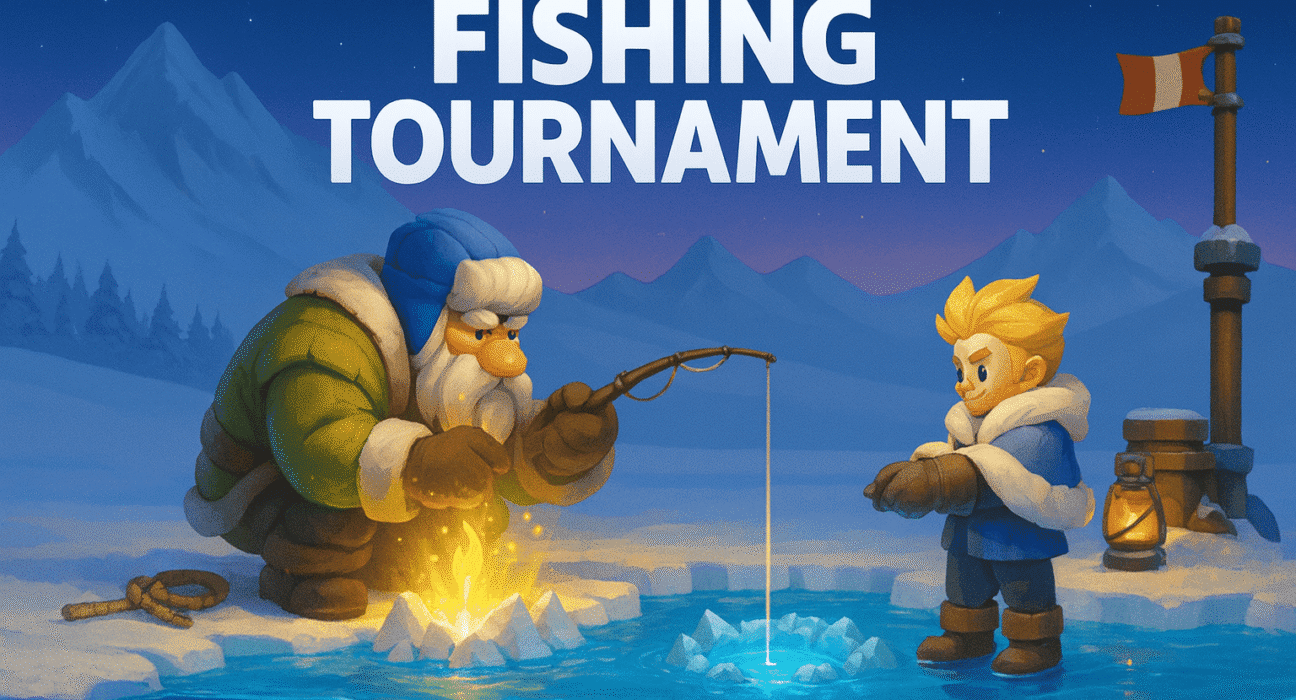
The Fishing Tournament in Whiteout Survival looks simple at first – drop a line, catch a few fish, and hope for good points. But the truth is very different. This event is all about strategy. Beginners often panic in deep zones, waste their bait, and miss rare fish because they don’t understand how scoring really works.
This guide is made especially for beginners who feel stuck or confused.
We’ll walk through the event step by step: how to descend safely, which upgrades matter most, how to use tools correctly, and how to reach rare fish without panic.
No complicated jargon. No advanced player pressure. Just clear, simple techniques that actually help you score more and climb the leaderboard.
If you’ve ever thought: “How do I actually get good at the Fishing Tournament?”
This is the guide that finally explains everything in a way beginners can use right away.
How the Fishing Tournament Really Works?
The Fishing Tournament arrives once a month0, and when it does, everything else suddenly feels less important. For many players, this event becomes a routine.
But for smart players? It becomes a goldmine of points, rare items, and leaderboard opportunities.
To master this event, you must understand its basic rules first. Let’s break it down clearly; step by step.
📅 How Often Does the Event Appear?
- The Fishing Tournament returns once a month.
- It lasts for a limited number of days.
- Each cycle includes daily missions, milestone rewards, and leaderboard rankings.
- During this time, players collect baits, perform dives, score points, and compete for rewards.
🎣 The Goal of the Event
Your objective is simple:
Catch valuable fish and items to score as many points as possible before your bait runs out.
But the best players don’t just “fish”.
They plan dives, time their bait, and reach deeper zones where rare fish live.
Understanding Baits (The Heart of the Event)
You cannot fish without bait, so bait management is the first core skill.
Basic Bait = Used in Ice Fishing mode
Treasure Chart = Used in Frosty Prospector mode
⏳ Bait Regeneration
You earn 1 bait every 3 hours, up to a maximum of 10.
If you reach 10 and don’t use any, you’ll stop generating more.
So never stay at full bait, use it regularly!
❗ Beginner Mistake
Most beginners waste dozens of baits because they wait too long, hit the 10 bait limit, and lose hours of regeneration time.
Pro Tip:
Always spend bait before reaching 10, treat bait like energy that must stay moving.
⚔️ Two Fishing Modes
You will see two different ways to play the event. Both are important, but one is more dangerous and rewarding.
Mode Difficulty Best For
🧊 Ice Fishing (Beginner-Friendly Practice & safe points)
⚓ Frosty Prospector (High Risk / High Reward Rare items & leaderboard)
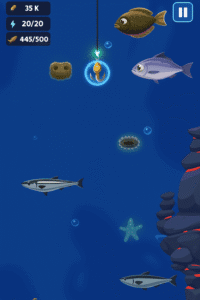
🧊 Ice Fishing Mode (The Practice Ground)
This is the basic fishing mode of tournament. You use normal bait and learn movement, timing, and depth control.
Best use for beginners to:
✔ Practice the Corner Technique
✔ Learn how fish move
✔ Understand depth layers
✔ Earn steady points safely
Tip: After 300m, vision becomes limited, using a Lantern here helps a lot (even one bought with gems is enough).
⚓ Frosty Prospector (The Real Challenge)
This is where experienced players score big. Instead of bait, you use a Treasure Chart to enter deeper waters immediately.
Here, you MUST be prepared to:
✔ Use tools before using chart/bait
✔ Expect clusters of obstacles
✔ Highest-score fish appear here
✔ Mistakes are punished immediately
Only play Frosty Prospector when your Fishing Kit is upgraded properly and you can stay calm under pressure.
Why Do Beginners Fail Early?
Because most beginners:
❌ Don’t use tools correctly, they don’t seriously know the order of
❌ Waste bait by staying at full cap
❌ Panic during descent
❌ Focus on early fish instead of depth
But now?
You won’t repeat those mistakes, because you already understand how the event actually works.
Fishing Kit Explained: The Upgrade Order That Actually Works
Most beginners upgrade their kit in the wrong order, and that’s why they panic, crash, and end with low points.
The Fishing Kit determines how deep you go, how fast you travel, and how much you can carry before resurfacing.
But the secret is this: your upgrades must follow a smart priority order or your entire dive becomes unstable.
Let’s break it down clearly.
🔧 Fishing Kit Parts & What They Do?
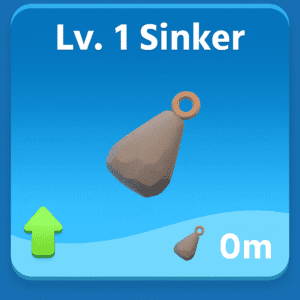
Part: Sinker
Purpose: Controls descent speed
What Changes When Upgraded: Faster drop → reach depth quicker
_________________________________________________
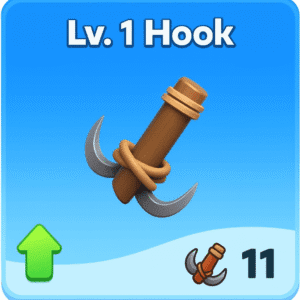
Part: Hook
Purpose: Determines carry capacity
What Changes When Upgraded: More fish/items per run
_________________________________________________
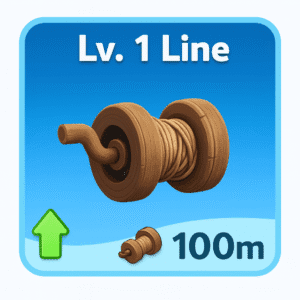
Part: Line
Purpose: Controls max depth
What Changes When Upgraded: Deeper reach → better targets
🎯 Your Upgrade Priority (All Time Best Strategy)
The best order for beginners, tested and proven is:
1 → Sinker → 2 Hook → 3 Line
Here’s why this works:
1. Sinker – First & Most Important
Upgrading Sinker gets you into deeper zones faster since you start with 0 on sinker level, skipping the useless mid-layers full of trash fish & low-value objects.
This saves bait AND increases chances of finding rare fish early.
- Faster descent
- Less time in danger zones
- Easier movement control
- Higher chance of reaching rare fish
Without a strong sinker, every dive becomes slow, risky, and unproductive.
2. Hook – Upgrade Second
Once you reach deeper layers successfully, you need a bigger Hook to carry more high-point items before resurfacing.
- Allows full rare-fish clusters to be collected
- Higher scoring potential in one dive
- Turns deep-zone dives into leaderboard runs
A strong hook turns a good dive into a GREAT dive.
3. Line – Upgrade Last
The Line gives access to deeper zones, but it’s ONLY useful when your Sinker is fast and your Hook is large enough to make deep dives worthwhile.
- Only useful when Sink & Hook are upgraded
- Helps you target rare fish zones
- Great for Frosty Prospector deep-runs
Line is powerful, but only when used at the right time.
❌ Why Beginners Fail?
Most beginners upgrade like this:
Line → Hook → Sinker
That leads to:
⚠️ Deep dives but slow descents
⚠️ Too many objects in initial and mid-zones
⚠️ Panic & early crashes
⚠️ Bait wasted with low scores
Your way is smarter – Sinker first. Suppose you have 100 meter line, but hook is 12 and sinker is 10 meter, you’ll struggle to reach deeper as a beginner and repeatedly end up getting same items because reaching deeper rare items takes big focus. You must avoid most initial obstacle and reach deeper with help with sinker to find some good plenty items in hook so you can collect massive points.
Tools & Items: The Right Way to Use Them
Tools are not optional, they are your lifeline during risky runs.
But here’s the rule that beginners must understand:
⚠️ First & Most Important Rule
🛑 Always Activate Special Tools Before You Use Bait
Once you tap “Use Bait”, your dive starts immediately, and special tools CANNOT be used anymore.
That means your setup must be done before the run begins.
Correct Order:
- Select your mode (Ice Fishing / Frosty Prospector)
- Activate your tools
- 👉 Then tap “Use Bait”
- Begin your descent with full control
This single rule helps beginners avoid 50% of wasted runs.
🌟 List of Tools & How to Use Them
🕯️ Lantern: For Deep Vision & Panic Control
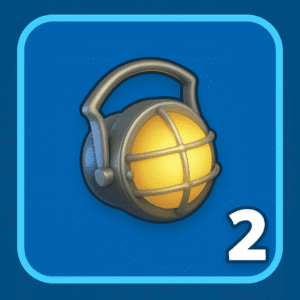
- After 280–300m depth, normal visibility becomes nearly zero
- Without a Lantern, beginners panic & crash
- Sometimes worth buying with gems, especially for practice
- Perfect for both Ice Fishing & Frosty Prospector
Best Use:
✔ Anytime visibility becomes too low
✔ Especially in deep zones & tight corridors
🔍 Ocean Scanner: For Finding Rare Treasures
The Scanner helps reveal:
- Rare fishes
- Relic clusters
- Deep treasures and Divers
💡 Pro Strategy:
Use Scanner ONLY when your Fishing Basic kit has been fully upgraded or in frosty mode.
This tells you exactly where to aim for scoring.
⚓ Reel Stabilizer: For Tight Movement Areas
This tool slows your movement and gives better control.
It helps you to:
- Pass you through obstacle easily
- Give hook multiple protection from items that you don’t wanna catch
- Very Helpful in Corner method to reach depth easily
🐚 Horn of Poseidon: Use Only for Rare Catches
Many players waste this on a common fish, which is wrong.
Best use:
✔ When a rare fish is just out of reach
✔ When your hook is nearly full
✔ During leaderboard push runs
📜 Treasure Charts: Must Be Used with Tools
Treasure Charts are ONLY used in Frosty Prospector mode.
Also using Treasure Charts require Lantern + Scanner + Stabilizer together for the highest chance of rare fish and relic drops
This let the fisher get higher chances to catch rare pieces.
Tools don’t make the dive easier. They make the dive safer, and safe dives lead to high scores, every single time.
The Corner Control Trick: How to Reach Depth Without Panic?
Most beginners fail not because they move wrong, but because they enter deep zones without control and start panicking.
Our exclusive method “The Corner Control Technique” is one of the best survival strategies for beginners. Let’s know with detail how it works:
Why Beginners Panic in the Deep Zones?
The mid-level depths (150m–300m) are the most dangerous:
- Too many obstacles
- Movement gets unpredictable
- Screen becomes harder to read
- Vision gets lower — panic begins
- One wrong move → hook collision → bait wasted
Your goal is simple:
- Survive the travel phase
- Reach depth WITHOUT touching anything
- ONLY THEN start catching fish
That’s why your corner technique works so well.
🚨 The Corner Control Method (Your Signature Trick)
Instead of moving constantly in the center (chaos zone), you park your hook in the corner and wait for openings.
🧊 Step-by-Step Method
- Move your hook into the top-left or top-right corner.
Corners have fewer objects than the middle. - Watch how fish bounce off the wall and move away.
This gives you clear timing windows. - If a fish/block moves toward your hook, slide slightly away.
No panic, just a soft movement. - After danger passes, return to the corner immediately.
This becomes your safe zone. - Repeat until you reach your target depth.
Then, only then, you start catching.
🌊 Why This Method Works?
✔ Avoids 70–80% of collisions
✔ Reduces panic during descent
✔ Helps beginners reach rare tiers safely
✔ Saves bait from being wasted
✔ Keeps your movement calm and strategic
This method does not guarantee more fish, but it protects your run, so you can reach the zone where rare fish actually appear.
Fishing Modes Explained
Ice Fishing vs Frosty Prospector – When to Use Each One?
The Fishing Tournament has two different fishing modes, and understanding them is the key to scoring consistently and climbing the leaderboard. Both modes are useful, but only when used at the right time.
🧊 Mode 1 – Ice Fishing (The Beginner’s Training Ground)
Ice Fishing uses normal bait. It’s safer, slower, and perfect for beginners. This mode helps you understand how fish move, how obstacles behave, and how to control your hook without panicking.
Ice Fishing is best when:
- You’re new to the Fishing Tournament
- You’re still upgrading your Fishing Kit
- You’re practicing the Corner Control Method
- You’re testing how your tools work
- You just want steady and safe points
Ice Fishing is where you learn control. It prepares you mentally and mechanically for deeper, more dangerous dives.
⚓ Mode 2 – Frosty Prospector (High Risk → High Reward)
This is the real challenge mode. Instead of bait, you will use a Treasure Chart to enter deeper zones immediately. That means better treasures—but also faster danger.
You should only enter Frosty Prospector when:
- Your Sinker and Hook are upgraded well
- You already practiced movement in Ice Fishing
- You know how to avoid panic while descending
- You understand tool usage
- You are ready to aim for high scores and leaderboard spots
📌 The Golden Rule for Beginners
Don’t rush to Frosty Prospector. Ice Fishing is not just the easier mode, it’s the mode that prepares you to survive the harder one.
Frosty Prospector is for control, not luck. If you master movement in Ice Fishing first, you’ll enter Prospector mode with confidence, and THAT is what actually wins tournaments.
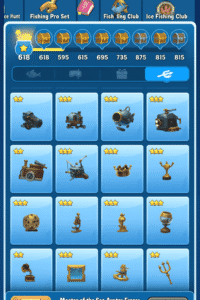
The Collection System – Your Permanent Power Archive
Every time you catch something new, it is permanently recorded in your Collection Guide. This system tracks five different categories:
- 🐟 Fish
- 🧍 Divers
- 🧰 Treasure Chests
- 🗿 Memorabilia
- 🌿 Algae
Each first-time catch gives:
- Instant Gems
- Star-rating progress
- Long-term collection completion strength
This means even casual players become stronger over time just by participating.
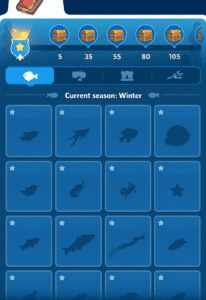
🌦️ Seasonal Layers: Why Collections Never Feel “Finished”?
Your Collection is divided into seasonal chapters:
- Spring
- Summer
- Autumn
- Winter
Each season introduces:
—New fish
—New algae
—New treasures
—New memorabilia sets
This turns fishing into a long-term achievement system, not a one-event grind.
What You Actually Unlock From Collections? (The Real Power Rewards)
Collections are not just cosmetic trophies. They grant global combat and movement buffs that affect your entire account.
#Catch 150 Fish
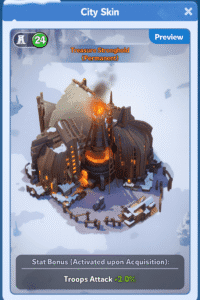
✅ Reward: Treasure Stronghold (City Skin)
✅ Power Bonus: +2% Troop Attack
This affects:
- PvP
- Bear Hunt
- Rallies
- Expeditions
- Arena
It is one of the earliest permanent attack buffs most players ever acquire.
#Catch 10 Divers

✅ Reward: Ice Journey (March Skin)
✅ Power Bonus: +5% Solo March Speed
This improves:
- Map control
- Event scoring
- Monster farming
- Time-based competitions
Speed = dominance.
#Collect 60 Memorabilia
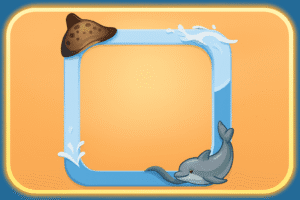
✅ Reward: Master of the Seas Avatar Frame
✅ Power Bonus: +2% Troop Defense
This is your silent survivability buff:
- Better rally defense
- Higher endurance in conflicts
- Stronger frontline durability
#Collect 10 Treasure Chests

✅ Reward: “Master of the Seas” Nameplate
Pure prestige. Pure identity.
#🌿 The Algae Collection
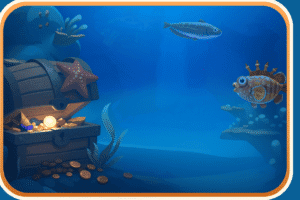
✅ Reward: Ocean Exploration Private Chat Skin
✅ Power Bonus: +1.5% Troop Health
Algae is the most misunderstood collection category.
It:
- Appears frequently at mid-to-deep depths
- Stabilizes gold star accumulation
- Smooths seasonal collection progress
- Enables consistent gem income
Fish give spikes. Divers give breakthroughs. Algae gives momentum.
This makes it exceptionally important for:
#Free-to-play players
#Long-term seasonal completion
#Memorabilia chain unlocking
🏆 The Leaderboard System – Prestige, Power & Public Authority
While collections build permanent strength, the leaderboard delivers:
- Temporary skins
- Massive Gem injections
- Speedup floods
- Identity prestige
But not all ranks give skins.
City Skin & March Skin Distribution (What Really Matters)
There are some amazing skin you get when you appear in fishing tournament leaderboard, lets’ take a look at some of the best skin rewards you get:
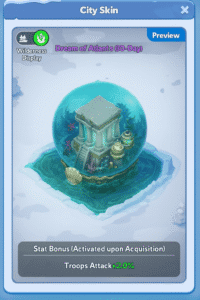
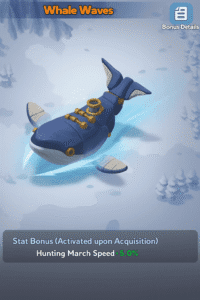
✅ Rank 1 – 3: Full Prestige Tier
- Dream of Atlantis – City Skin (30 Days)
- Whale Waves – March Skin (30 Days)
- Song of Ocean – Avatar Frame (30 Days)
This is the only tier that grants:
✅ City Skin
✅ March Skin
✅ Avatar Frame
Together.
This bracket defines:
- Server recognition
- Visual dominance
- Competitive authority
✅ Rank 4 – 10: City Skin Elite Tier
- Dream of Atlantis – City Skin (30 Days)
- Song of Ocean – Avatar Frame (30 Days)
You still gain the Atlantis City presence, but without the marching whales.
This is the perfect balance tier for high-ROI competitors.
Rank 11 – 500: Growth Without Prestige
From Rank 11 onward:
- No City Skin
- No March Skin
Only Gems & Speedups however till rank #25 you can get frame too
Yeah That’s all, if you’ll truly understand this much of information about Fishing Tournament Whiteout Survival, you’ll pro in very less time. You’ll start gaining more rewards and enjoying more catching fishes.